Every product on Amazon has a listing, or Product Detail Page. This is the content that customers interact with before they purchase your product.
The better your content on your detail page, the more customers you’ll convert. This is why it’s important to optimize your listings for conversion. And in this article, we’ll outline how to do that. We’ll cover the following topics and how they affect sales:
All sales come from traffic and conversion. If you want to increase sales, you can either increase how many people see your listings, increase how many of those people purchase your product, or both.
On Amazon, there are two conversion metrics that matter. The first is your Click-Through Rate (CTR), and the other is your true Conversion Rate (CR). Below are how those metrics are calculated.
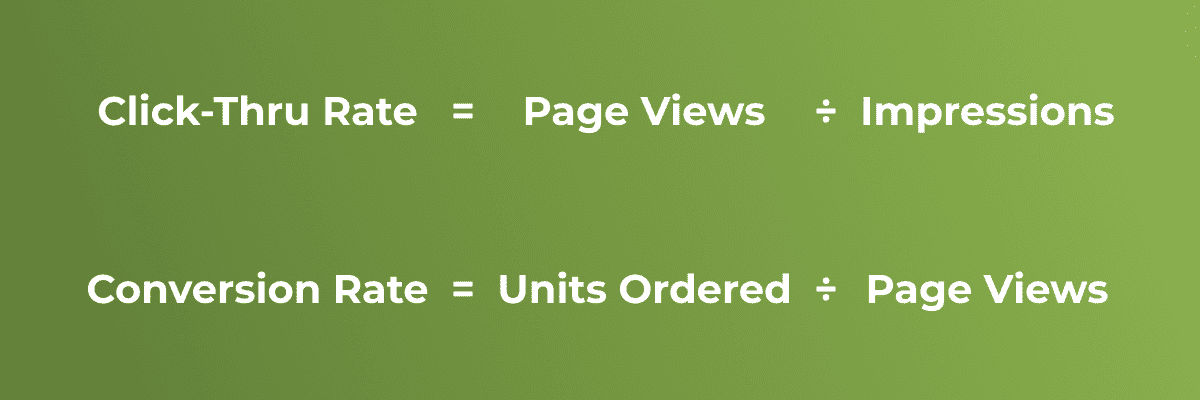
Depending on who you talk to, you might hear that conversion rate is calculated differently. Even Amazon doesn’t have a specific “conversion rate” metric because there are a number of different ways to calculate it. Instead, Amazon has the “Unit Session Percentage” metric inside their business reports tool.
The Unit Session Percentage is calculated by taking the total number of units ordered and puts it over the total number of sessions on your detail page (Unit Session Percentage = Units Ordered / Page Sessions).
This metric is not the most useful as it mixes both gross metrics (units ordered) and net metrics (sessions). We prefer to utilize only gross metrics (units ordered and page views) or only net metrics (total orders and sessions).
However you calculate it, the goal is to get your conversion rate higher. And in this article, we explain how to do that.
Since someone needs to click on your listing in order to buy it on Amazon, it’s important that we start our conversion optimizations there.
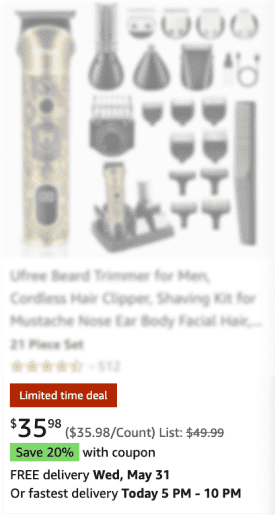
Your listing appears among many in a Search Engine Results Page (SERP). The goal is to convince shoppers to click on your listing instead of someone else’s. Here’s what the first line in a SERP for the search term “beard trimmers” looks like.
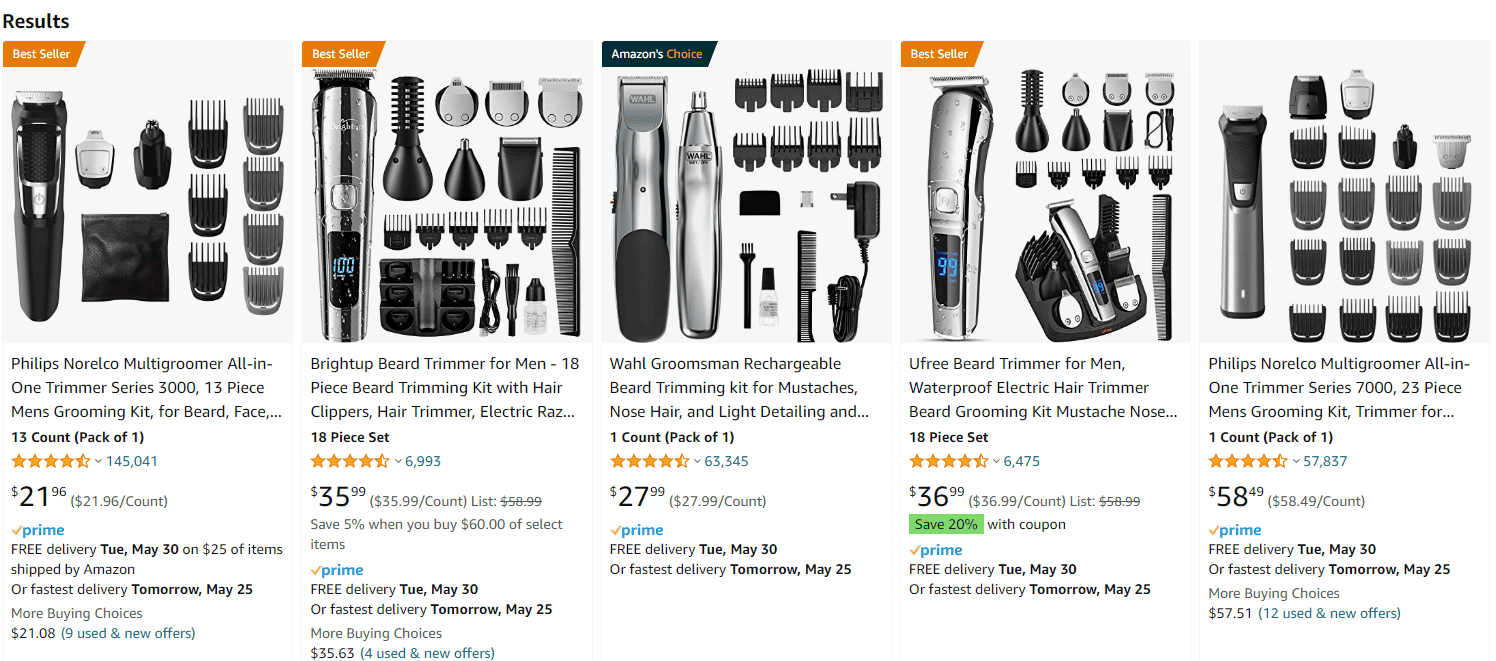
The SERP can be very competitive, and there are only so many factors you have control over to convince customers to click on your listing. They are:
Even inside that list, you only have so much control over reviews, price, and listing badges. That means you really only have four things that you can control to get customers to click on your listing.
Your main image takes up the most space on the SERP. Before reading the title, looking at the price, seeing if it’s prime, etc., customers will look at the image. In other words, it’s super important.
Generally speaking, Amazon requires that your main image contain just the product on a blank white background. There are some exceptions, but in almost every category, those are the restrictions you’ll have to deal with.
To compensate for restrictive main image policies, all of the above listings have the product next to all of the accessories that come with it. The Ufree listing even goes as far as to have an additional example of having the product set up on the charger.
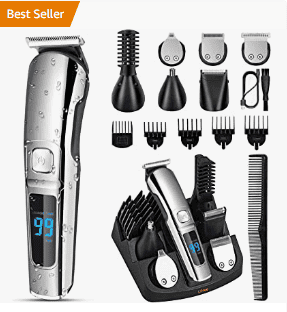
You might need to get creative to stand out in the SERP with your main image.
Listings that have the Prime badge have a significantly higher conversion rate than those that don’t. It’s not uncommon to see a 5x-10x increase in conversion rate when a listing gets Prime status.
Although having your product be Fulfilled By Amazon can be costly, it’s often not much more than fulfilling the product yourself, and it usually makes up for itself in cost when you factor in the increase in sales.
We understand that there’s only so much that can be done with pricing. Sellers have product cost, Amazon fees, advertising expenses, storage fees, etc. to worry about. Amazon’s a competitive marketplace, which can make pricing your product in an appealing way difficult.
This is actually one of the reasons focusing on getting a high conversion rate. If you can get all the other factors of conversion dialed in, you can increase your profit margin. Traffic to your listing can be expensive, so the more of that traffic you can convert, the better your profits.
Having a good price is vital to getting the initial click, too. If your offer isn’t compelling at first glance, it’s hard to get customers to click through to your detail page.
The product title is a largely overlooked factor of conversion—but it’s so important!
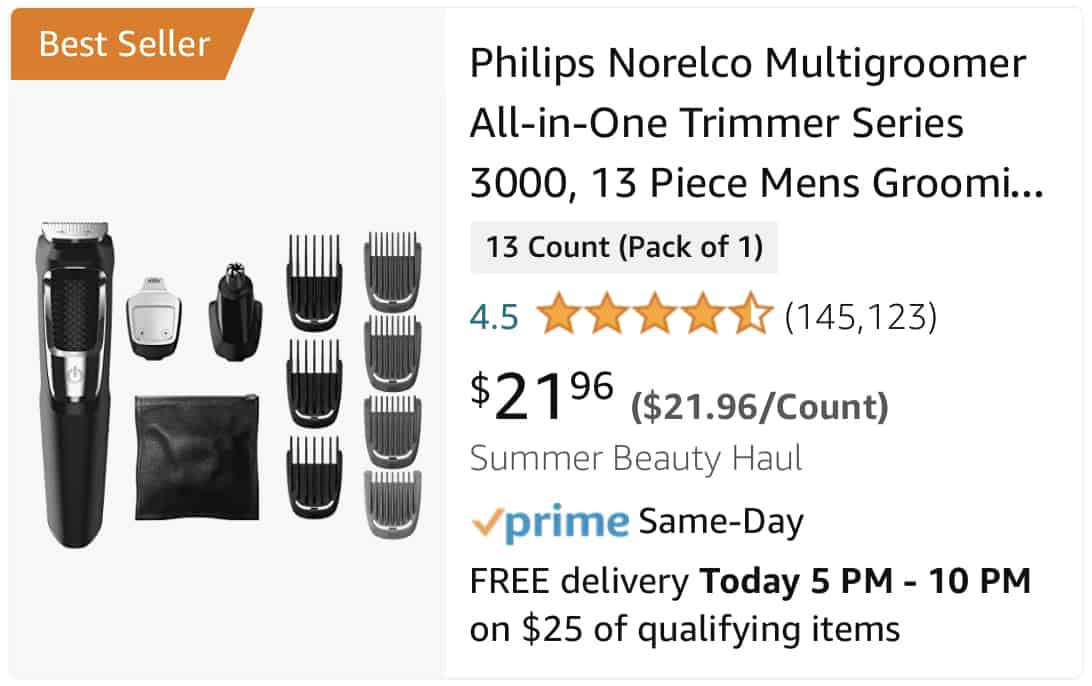
Take a look at the following titles, taken from that same SERP of “beard trimmers”.
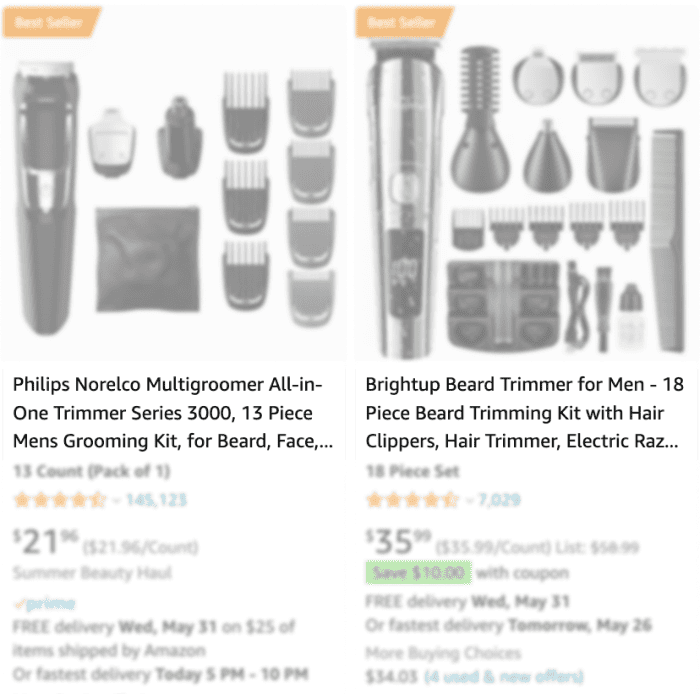
Titles are often thought of as a factor in Search Engine Optimization (SEO) on Amazon—and they are. But customers read the titles of the products they click on, and if you don’t have a good title, it’s hard to convince customers to click on your product.
Yes, there are keywords for SEO in these two titles, but they’re also descriptive. It doesn’t just have the name of the product, or a bunch of keywords stuffed in there. Instead, the titles tell you what the product is in a pretty efficient way.
“Philips Norelco Multigroomer All-in-One Trimmer Series 3000” is the name and model of the product, “13 Piece Mens Grooming Kit,” tells you what it is, “for Beard, Face,…” tells you what it’s used for.
Between the picture and the title, you know exactly what you’re clicking on.
The Brightup Beard Trimmer on the other hand could improve its title. It has both “Beard Trimmer” and “Beard Trimming” which is redundant. They could trim the fat a little bit and make it more descriptive:
“Brightup Beard Trimmer for Men – 18 Piece Kit with Hair Clippers, Trimmer, Electric Razor – IPX7 Waterpr…”
That’s what their title would have looked like without the redundancy, which includes the mention of the waterproof rating before the elipses.
Note: You can usually have over 150 characters in a product title. However, on desktop, the title gets truncated with an elipses at around 105 characters. And on mobile, it gets cut down to only 60 characters.
This is why it’s important to be as descriptive as you can as efficiently as possible with your title. Keywords are important for SEO, it’s true. But all the impressions you get in the SERP will be pretty useless if your listing doesn’t compell people to click on your product.
So if you can get your point across in 60 characters, then put your keywords at the end of your title, that’s the best way to go because it strikes a balance between conversion and SEO.
Amazon in notorious for being strict with their review policies. And it’s for a good reason. No one wants people manipulating the algorithm to sell products that customers hate.
That said, reviews are worth their weight in gold because Amazon ultimately cares more about what customers say about your product than what you say about it.
There are a bunch of grey-hat and black-hat methods used on Amazon to get reviews. They’re all very risky because they’re usually against Amazon’s Terms of Service. And every year, Amazon gets better and better at detecting manipulated reviews.
In our view, it’s not worth risking your entire seller account for a few reviews. Instead, the two best things you can do for reviews are:
The Amazon Vine program allows you to give your product away to reviewers Amazon has selected for free in exchange for a review. It can be costly ($200 + the cost of any units reviewed), but it’s worth every penny.
Anything you can do to catch a potential customer’s eye with your listing helps in boosting click-thru rate. This is why listing badges, like “Best Seller” or “Amazon’s Choice” can be so beneficial. Those badges look like this:


It should be noted that the “Best Seller” badge is category specific, while “Amazon’s Choice” is keyword specific.
This has led a lot of sellers to try and wrangle their products into product categories they shouldn’t be in. The thought is, if they can put their product into a smaller category, then it’s more likely they’ll get the best seller’s badge.
This might be true in some situations. But generally speaking, it’s not worth the hassle. It can be tricky to change a product category, if Amazon lets you change categories at all. And more and more often, Amazon does not let sellers change their categories once they’re set.
Besides, it can have a negative effect on SEO if you put your product in the wrong category. So usually, it’s best to just try and make the best product possible, and then put it into the most relevant category possible.
But this is how the Philips and Brightup beard trimmers were both able to have Best Sellers badges. Because they were in different product categories. Philips in the “Men’s Shaving & Grooming Sets” category, Brightup in the “Men’s Electric Shaver Accessories” category.


Unlike the listing badges, you have a lot more control over Coupons and Limited Deals. These promotions cost a nominal fee to run, plus whatever the actual cost of the discount applied in the deal.
Coupons are generally small in discount. They really are, in large part, just to have an extra pop of color on the SERP that draws customers eyes toward your product. However, it’s also not uncommon to see coupons discount a product up to $10 as well.
Limited Time Deals, on the other hand, usually require that a product is discounted by at least 20%. In exchange, Amazon gives you a slightly bigger badge.
You can even run both Coupons and Limited Time Deals at the same time, which really eats into your profit margin, but will probably boost your click-thru and conversion rates. That said, we generally don’t recommend running promotions that are not sustainable for your business.
Once someone’s clicked on your listing, there’s a lot more you can do to actually persuade them to purchase your product, in addition to everything you had to convince them to click on your listing in the first place.
Unlike your main image, which has to be on a blank white background, you have a lot more flexibility with your other images. Additional images usually fall into three categories:
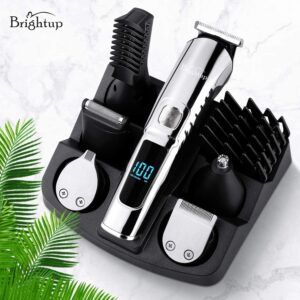
Studio images are much like the main image. The product is displayed in a very favorable fashion, although not much else is going on. You can put the product on a blank white background, as you do with your main image, but you also don’t need to.
Studio images can be effective because it shows the product in ideal lighting and conditions. Studios are highly controlled environments, so it’s easier to get the product to look exactly how you want it to. Here’s an example:
Lifestyle images show the product in use. In the case of a beard trimmer, a lifestyle image would demonstrate someone actually using the product. It’s important that in these images that you focus on the product, not the person using it.
Lifestyle images are effective because they help your customers visualize how the product can fit into their own life. If they can see someone else using the product, they can see themselves using the product. Here’s an example:

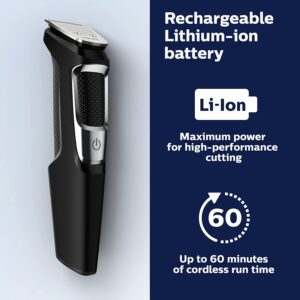
Without a doubt, though, the most effective images to add to your listing are infographics. Infographics are images that features and benefits highlighted on the product. They convey the most compelling selling points for your product through imagery.
Infographics are effective because you can leverage them as part of additional studio images or lifestyle photos. Essentially, if there is space on the image, why wouldn’t you put useful information on the image?
They’re also very effective because they’re more visual than just reading words on a page. Infographics allow customers to skim information about your product more efficiently than if they read your bullet points. Here’s an example:
Depending on the category you’re in, Amazon gives you space for at least 9 images on your listing, although only 7 will display without opening the image gallery. We recommend you use all slots, if you have the photo assets. And you should display your best images as prominently as possible.
The most effective images to use are infographics and studio images. An internal assessment we did at BLAZON indicated that there wasn’t a clear indication between which kind of image converted the best—studio or info graphics. The best sellers in each category on Amazon use both frequently.
However, it should be noted that for smaller brands, customers typically want more information than not. So unless your brand is a household name, it’s vital that you have high quality infographics. These infographics should be over-crowded with words.
The least common image type among Amazon’s best sellers were lifestyle images. Most listings had no lifestyle images at all, while very few had more than one.
While there is no standard image configuration that leads to the best conversion rate, a good rule of thumb is:
Whatever images you end up using, they should have a purpose and be as helpful as possible to your customers.
As mentioned before, titles should be descriptive and efficient. From an SEO standpoint, you want your title to have as many relevant keywords as possible. But from a conversion rate standpoint, it’s best to just give your customer the most helpful information regarding your product.
Here’s that full Philips Beard Trimmer title from earlier:

You can see that it does have a lot of really relevant keywords in it. But mostly, it focuses on trying to give the customer as much information as possible without writing an entire novel about the features and benefits.
Generally speaking, the best converting titles are ones that are easy to read. So if your titles are too wordy, they might hurt your conversion rate.
Almost everything about titles applies to the bullet points on your detail page (key product features). Your bullet points are a chance for you as a seller to highlight the benefits and features of your product as well as overcome common objections and answer questions.
There are two schools of thought when it comes to writing bullet points, and there are successful listings that use both methods.
The first method is to take the SEO route and use all the possible space Amazon gives you in bullet points to fit as many keywords in as possible. This is very common, and it results in these big, blocky sections of text:
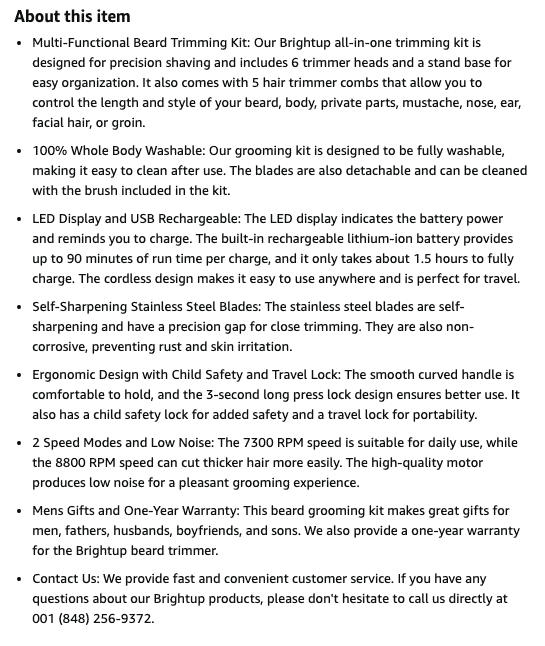
The other method is to be efficient with your bullet points and focus on just the most important information.
On the one hand, you can communicate much less information with this method, and you can’t put as many keywords into your listing. On the other hand, the bullet points are more accessible, making it more likely that your customer will actually take the time to read them.
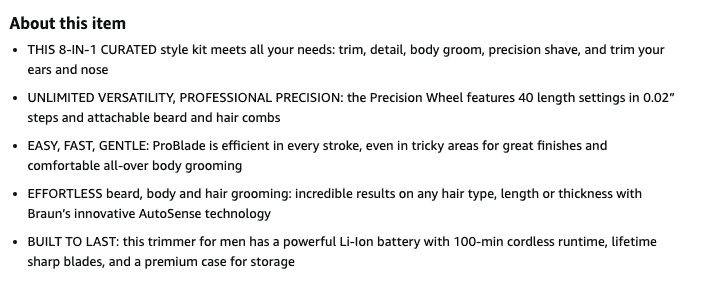
Again, it’s not very clear which method leads to the most conversions. However, if you’re putting information in your bullets just to fill up space or stuff keywords in there, that’s probably not a very good experience for your customer, and we’d recommend sticking with information that’s helpful.
Product descriptions are seen less and less as Brand Registry becomes more common. With Brand Registry, you have the opportunity to create A+ pages, which are a much better customer experience than product description. A+ content takes the place of product descriptions, so if you have the option to create A+, leverage that.
That said, if you don’t have the ability to create A+ pages, then product descriptions are the best you’ve got. There’s also an SEO benefit to writing them, so it’s worth doing.
Amazon’s product descriptions support some basic HTML text formatting, such as a line break, which can be done with the following:
<br>
This allows you to separate a big block of text in to smaller chunks. Since Amazon allows up to 2000 characters in the product description, it can be very useful to utilize line breaks.
A+ Content takes the place of product descriptions and exists below the initial fold of a listing. Since the vast majority of customers will scroll to the bottom of a detail page to look at the reviews, this gives you a huge opportunity to engage with your customer before they buy.
The best A+ pages are highly visual, with images and info graphics. Zoomed out, they look like this:

As you can see in this A+ page, Amazon gives sellers 5 modules. These modules are a combination of different sized images with text next to or below them. In the case of this Braun A+ page, they created four infographics, and just inserted them as images. This is a very common and very effective way of using the A+ page.
The bottom module is an important one. We recommend using a comparison chart whenever you can. If you have several SKUs, especially in the same product line, this is an excellent way to cross sell and upsell product to your customers. This is what it looks like a little closer.
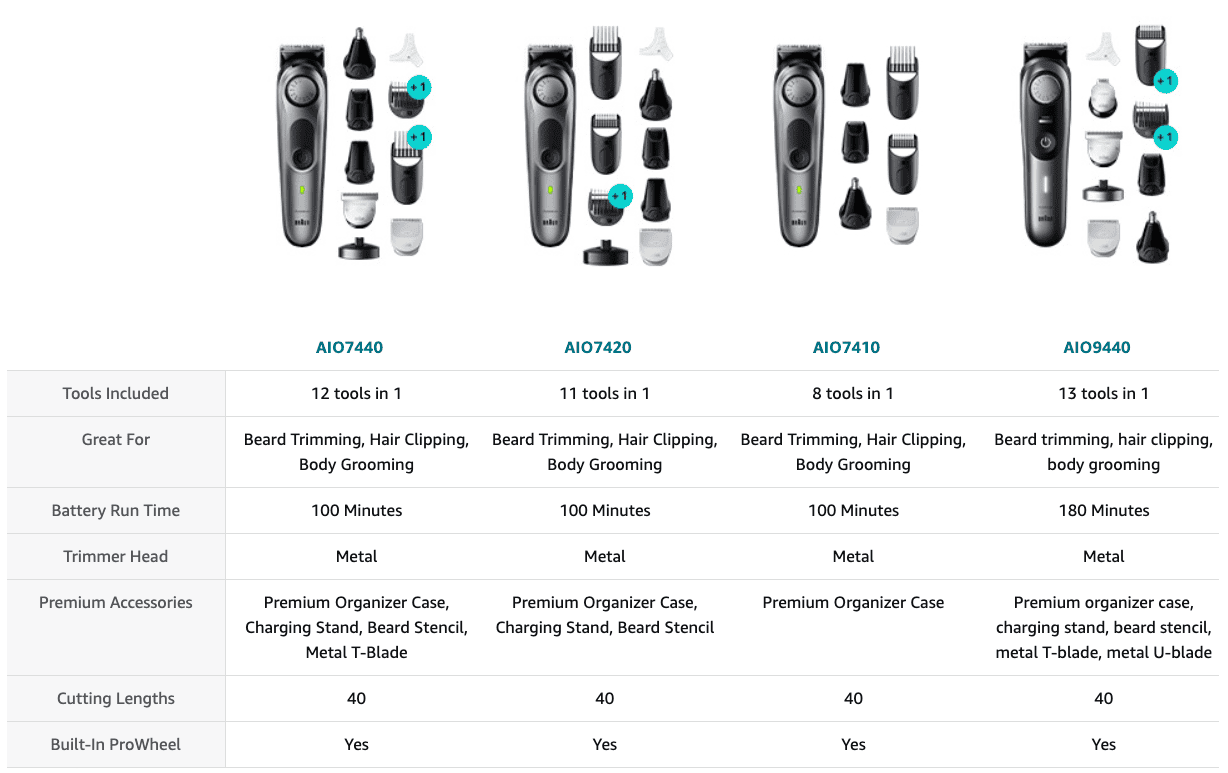
Wherever possible, make your A+ Content as engaging as possible. This is the most flexible piece of content on the detail page, and lead to quite a lift in conversion rate if done well.
Brand Registered sellers can add videos to their listing, which appear next to the other uploaded images. These videos can be up to 5gb in size, and should be at least 480p or higher in resolution.
Amazon does have a fair amount of policies regarding what can be and can’t be in videos on listings, but the biggest one is that they don’t want any URLs leading to external sites. Any videos with links to other websites will be suppressed.
Other than that, the best videos to add to your listings should be instructional. They should have solid information about your product, how to use it, its features and benefits, and what the customer should expect when they purchase your product.
Since videos are often costly, especially for small brands, most sellers just use whatever videos they have. While this is probably acceptable, it’s most effective if you have a video tailored to fit the listing experience.
Toward the bottom of your listing, right above the customer reviews, there’s a section for questions and answers. Anyone can ask a question, and anyone can answer. The ones voted most helpful get displayed.
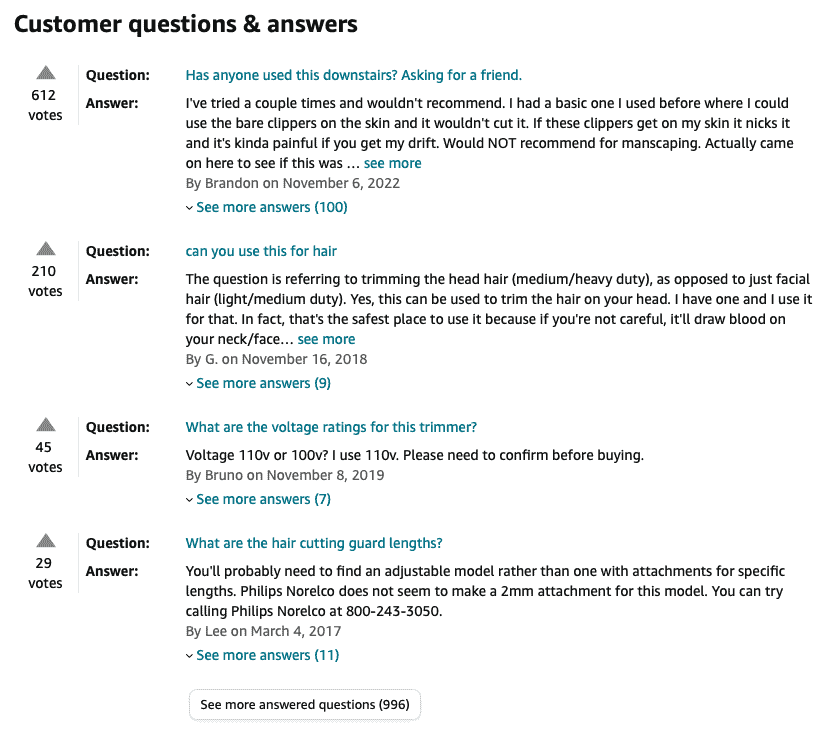
You can answer these questions as the manufacturer or seller if you create a front end profile with your seller account. To do so, you visit the profile page on the front end of Amazon:
From there, you can create and fill out the profile for your brand. And when you respond, your answer will be tagged either “Manufacturer” or “Seller”. This can lend credibility to your answers as well as indicate to customers that you’re engaged with them.

Like we mentioned earlier in the article, almost every customer who is seriously considering your product will look at the product reviews. Reviews are located at the bottom of the detail page of your product.
The reason it’s so important to optimize your listing for conversion as much as possible is that it gives you more opportunities to interact with your customer before they reach the customer reviews.
This gives customers an emotional anchor. By the time they get to the reviews, they’ve interacted with your product in the following ways:
If all of those things were good experiences, then customers are more likely to have a good experience in the reviews too.
Of course, the caveat is that you actually have to have a good product. If you’re selling your customers a lemon, then no amount of listing optimization is going to lead to a good customer experience.
The things listed in this article are just the most visible things you can do to improve your listing. There are additional things that have less of an impact, but are important to consider.
Right below the title is the “byline”. The byline shows the name of your brand. But if you’re Brand Registered, it can also link to your Amazon Brand Store.
This is what the byline looks like when you’re not Brand Registered:

And this is what it looks like if you are Brand Registered.
The Amazon Brand Store is like a mini website that lives on Amazon. You can link to different products, customize content and messaging, and make it all your own.
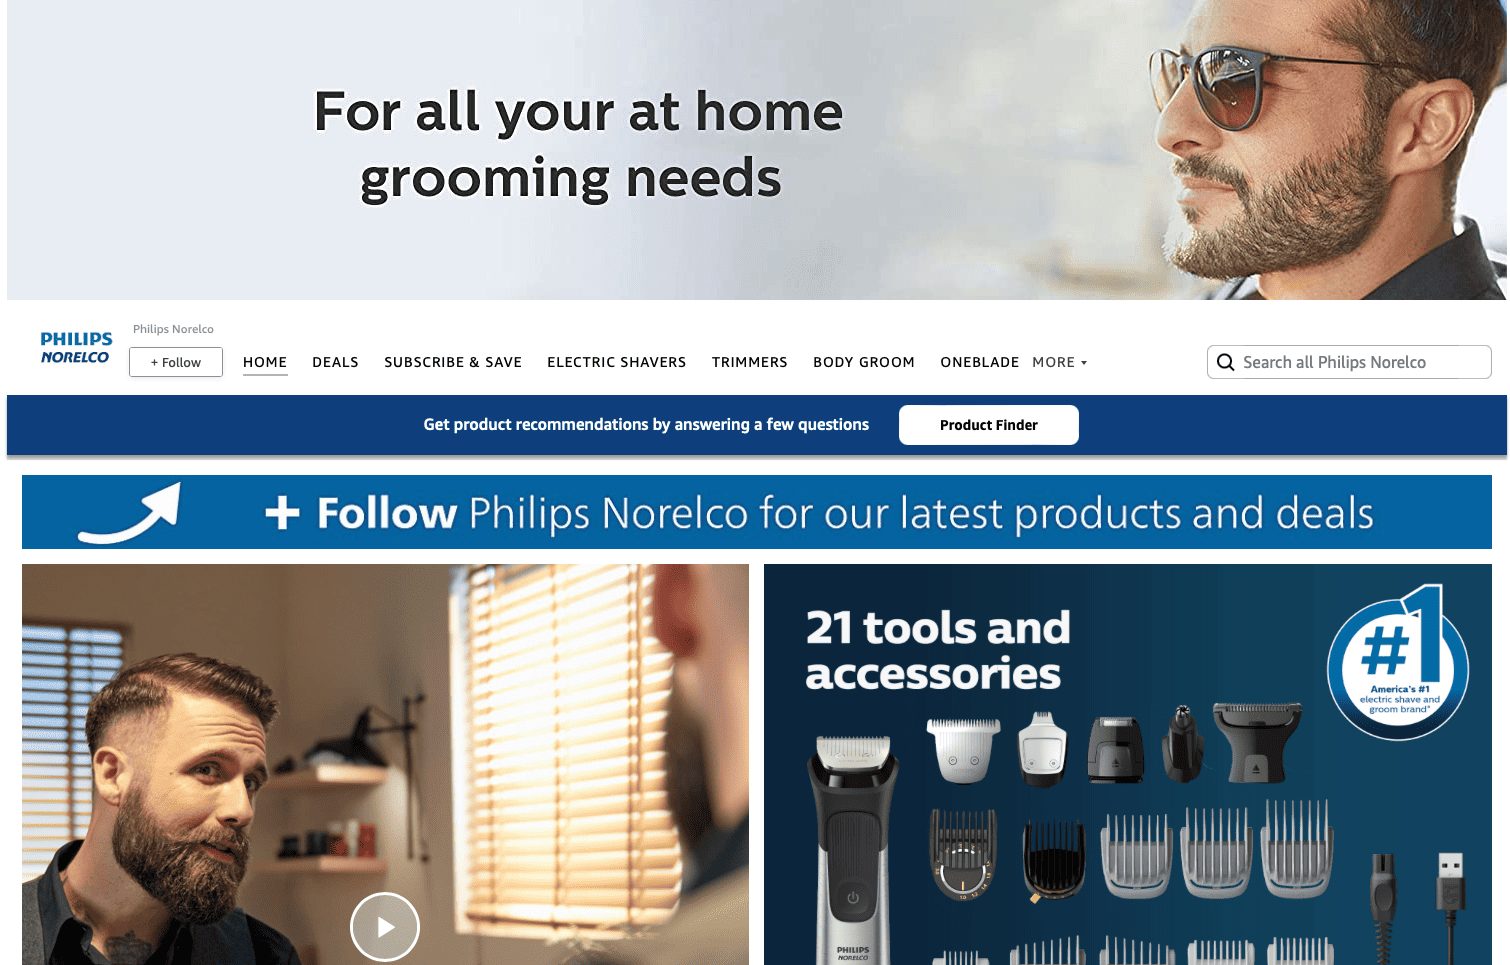
Some PPC advertising types allow you to link to your Store instead of a product detail page. So you can leverage your store to cross sell your products, or just have more control over your brand messaging.
Customers can also “Follow” brands through their stores, which can lead to more marketing opportunities down the road. More and more, Amazon is giving privelages to Brands that have stores set up, so they can be a really valuable tool for bringing in sales long term.
Ultimately, though, the conversion takes place on the detail page. So that’s where the majority of your efforts to increase conversion should go.
Another section of the listing that Brand Registered sellers can take advatange of is the “posts” section. This section appears a little after the A+ Content, but before any questions and answers, and it looks like this:

Amazon posts are a sort of social media for sellers. It’s the most effective way of getting brand followers for your Amazon Store, make your brand look more established, and can be helpful to the customer.
The posts link to your post area on your store, where you control the messaging. And long term, they’re good for sales and customer retention. But these won’t make a huge difference on your conversion rate as the posts lead the customer off of the detail page.
The last thing worth discussing is product documentation. Amazon lets you upload any sort of product manuals, safety sheets, or guides in PDF format. This section also appears below A+ Content, but above the product reviews.

While this section is often overlooked by customers, it’s still a best practice to upload the product documents that you have just in case. Ultimately, the brand that communicates best with their customers is the one that gets the sale, so it’s better to upload product documents in the off-chance a customer looks at them, than not upload them and possibly lose a sale.
Amazon gives you the ability to split test attributes of your listing for conversion. Split testing takes two versions of the same attribute and sends traffic to both versions of the listing (split 50/50). This can help you better understand what is effective in conversion, and what’s worth updating.
From the drop-down menu in Seller Central, hover over “Brands” and select “Manage Experiments”.

From the Experiments page, you can split test different aspects of you listing to figure out what converts best. The different attributes you can split test are:
It’s a good idea to only split test one attribute at a time. Amazon recommends running a A/B Test for 8-10 weeks before making a permanent change. If the difference in conversion is dramatic, you’ll probably know before that time frame, though.
Always trying to improve your listing is an important key to success. Even if your listing is performing well, it’s a good idea to revisit what you’ve done to see if new data prompts any changes.
Design & Developed By Envawebstudios2025